
Posted by Cas on Nov 15th 2026
Stereo Wiring Harness: What It Is and How to Pick the Right One
Stereo Wiring Harness: What It Is and How to Pick the Right One

A stereo wiring harness is a plug-in adapter that sits between your car’s factory radio connector and a new aftermarket head unit, so you never cut or splice the factory wiring. You pick it by your vehicle’s year, make and model and by the features you want to keep, such as steering-wheel controls or a factory amplifier. If your car has a factory amp or a data-based (CAN-bus) radio, a basic harness won’t be enough. Getting the harness right matters most when you plan to add an amplifier or subwoofer later, because that is where a mismatched part shows up as noise, dropouts or a dead radio. Our team at Crystal Audio Solutions builds system plans around exactly this kind of compatibility check, before anything ships.
TL;DR
- A harness plugs into the factory radio connector on one end and your new head unit’s connector on the other, so the car’s original wiring stays untouched.
- Choose by vehicle year, make and model, then check for a factory amplifier, steering-wheel controls and CAN-bus data, because each can need an extra module.
- Disconnect the negative battery terminal first and stay away from airbag wiring.
- Connect wire to wire by function, not by color alone, and use sealed, crimped or soldered joins.
- A basic head unit swap is usually an afternoon job. Plan your amp, subwoofer and power wiring at the same time and you only open the dash once.
Table of Contents
- What a stereo wiring harness actually does
- How to choose the right harness for your vehicle
- Do wire colors follow a universal code?
- How to connect an aftermarket stereo to the harness
- The step most guides skip: plan the whole system
- What to buy alongside the harness
- Common mistakes
- Where Crystal Audio Solutions fits
- Our perspective
- FAQ
- Sources
What a stereo wiring harness actually does
Behind your factory radio is a plastic plug. It carries power, ground, speaker wires and a few control signals. Aftermarket head units don’t use that plug. They come with their own harness of loose, color-coded wires that follow the stereo maker’s layout.
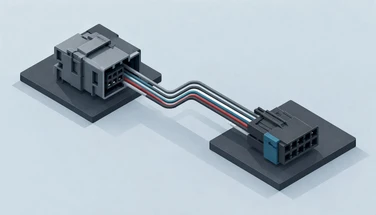
The wiring harness (also called a radio wiring harness or adapter harness) is the translator. One end is molded to fit your vehicle’s factory plug. The other end is a set of wires that you join to the wires on your new stereo’s harness. When it’s done, the whole thing clicks into the car like the original radio did, and you can reverse the swap later by simply plugging the factory radio back in.
A typical harness carries these circuits, as described in a general overview of harness components:
- Constant 12V: keeps the clock and saved stations alive when the car is off.
- Switched (ignition or accessory) 12V: turns the stereo on and off with the key.
- Ground: the return path for all the current.
- Speaker pairs: a positive and a negative wire for each of four speakers.
- Control wires: illumination (dimmer), power antenna, amplifier turn-on and, depending on the car, reverse and parking-brake signals.
It also usually includes an inline fuse on the power lead. Cutting your factory plug off to do the same job saves a few dollars and costs you the ability to undo it. It also puts your car’s electrical system at the mercy of every splice you make.
Three harnesses people confuse
Installer guides separate three different parts, and mixing them up is the most common reason a first-time buyer orders the wrong thing:
- The factory harness: already in the car. Its wire colors usually don’t match aftermarket stereos, and its plug should be left uncut.
- The vehicle-specific adapter harness: the part you buy. It mates with the factory plug.
- The head unit’s own harness: supplied in the stereo’s box, using the stereo maker’s color code.
You are joining number 3 to number 2, on a workbench or kitchen table, and then plugging number 2 into number 1.
How to choose the right harness for your vehicle
The selection rule is simple: the harness is matched by year, make and model, and it plugs between the factory connector and the new radio. The details are where people get caught. Work through these questions in order.
1. Exact vehicle, including trim and sound system
The same model year can have two or three different radio plugs depending on trim. Premium sound systems usually use a different harness from base systems. Note the exact trim, and whether your car came with a branded or premium audio package. If you’re unsure, a look at the back of the factory radio or the window sticker settles it.
2. Factory amplifier or not
A car with a factory amplifier sends low-level audio to a separate amp, not a speaker-level signal to the doors. A standard harness expects to power speakers directly. On these cars you typically need an amplifier-integration harness or interface, or the new stereo will play quietly, distorted or not at all. This is the single most common surprise on premium-audio vehicles.
3. CAN-bus and switched power
On many newer vehicles, the radio gets its “turn on” signal over a data network rather than a simple wire. One guide reports that on CAN-bus vehicles a standard harness provides no switched 12V and an integration module is required, and that this is common on Chrysler, Ford and VW platforms after 2008. Treat that as a signal to check your specific car before ordering, because it varies by model.
4. Features you want to keep
Steering-wheel controls, a factory backup camera, chimes and a factory USB port don’t always survive a radio swap. A guide on replacing a factory stereo without losing features recommends starting with the features you want to retain, then choosing a compatible adapter and receiver, rather than assuming everything carries over. Write your list before you pick a head unit, not after.
5. Wire quality
Harnesses vary in wire gauge (thickness). Some budget universal harnesses use thin wire, and thin wire is a poor fit if your head unit has a powerful built-in amplifier. The same guide suggests heavier 16 AWG stranded copper for the main power and ground leads on high-power head units. That is guidance from one source, so use it as a prompt to compare gauge on the product page, not a universal standard. If you don’t know what the numbers mean, our car audio wire gauge guide explains how to read them.
Do wire colors follow a universal code?
Mostly, but not always. Aftermarket stereo makers follow a broadly shared color convention, and the adapter harness is designed to use that same code on its stereo-side end. That is why the usual instruction is to match the adapter’s wires to the stereo’s wires by color, then confirm against the paperwork.
Typically you will see:
| Function | Common color on aftermarket stereos |
|---|---|
| Constant 12V (memory) | Yellow |
| Switched 12V (ignition/accessory) | Red |
| Ground | Black |
| Power antenna or amp turn-on | Blue or blue with white stripe |
| Illumination (dimmer) | Orange or orange with white stripe |
| Speaker pairs | White, gray, green and purple, solid for positive and striped for negative |
Treat the table as a starting point. Some vehicles and stereos deviate, and the instructions packed with the stereo and the adapter win over any chart you find online. If a color and a printed diagram disagree, trust the diagram.
Older vehicles, roughly pre-2000, may lack some signals altogether. One installer resource notes that parking-brake, reverse and amp turn-on signals may have to be tapped from the vehicle’s own wiring on those cars. Features that depend on those signals, such as video-while-parked locks or backup camera triggers, are where this matters.
How to connect an aftermarket stereo to the harness
This is a bench job. Do it with the harness out of the car where you can see every wire.
Step 1: Disconnect the battery
Disconnect the negative battery terminal before you unplug anything behind the dash. It protects the car’s electronics and you. It matters more because airbag circuits are nearby. Manufacturer service documentation is blunt about this: a General Motors bulletin on the NHTSA site says that when working on or near airbag wiring the system must be disabled, because the wrong procedure can deploy the airbag and cause serious injury. Airbag wiring is typically wrapped in yellow loom or uses yellow connectors. Never cut, probe or splice it. If your radio swap puts you anywhere near it and you aren’t certain, stop and have a qualified installer handle that part.
Step 2: Lay out the two harnesses
Lay the adapter harness and the stereo’s harness side by side. Match wires by function using the color code and the diagrams for both.

Step 3: Join each pair
Strip about half an inch of insulation, join the matching wires and seal each joint. Your options, from most to least forgiving:
- Solder with heat-shrink tubing: a strong, sealed, long-lasting join. One installer source recommends solder seal connectors for exactly this job because the solder and shrink tubing create a sealed bond.
- Crimp connectors: quick and reliable when you use the right crimp tool and a connector sized to the wire. Pinching with pliers is not a crimp.
- Twist and tape: don’t. It works on the day and fails on the first hot summer.
Keep each join staggered rather than lined up in a thick lump, so the bundle slides behind the dash without pressure on any one connection.
Step 4: Handle the leftovers
Cap every wire you don’t use, individually. A bare end touching metal can blow a fuse or short out something expensive. If your amp-turn-on or antenna lead isn’t used today but you’re planning an amplifier, don’t cap and forget it. Label it.
Step 5: Test before you reassemble
Reconnect the battery, plug the harness into the car and the stereo, and check power, memory, each speaker, steering-wheel controls and illumination. Use a multimeter if something is off, not a test light. Test lights can draw enough current to upset sensitive circuits. Only when everything works do you secure the stereo in the dash.
How long it takes
Expect roughly one to three hours. One pricing guide puts a basic swap at about an hour and CAN-bus or amplifier jobs closer to three. Doing the harness prep on the bench ahead of time is where the time is saved.
The step most guides skip: plan the whole system
Most people searching for a stereo wiring harness think they have a wiring problem. Often they have a system problem. The harness solves exactly one thing: getting a new head unit to talk to the car. It does nothing for what happens once you add an amplifier and subwoofer, and that’s where compatibility trouble gets expensive.
A few examples of how the pieces connect:
- The head unit’s preamp outputs and remote turn-on lead feed your amplifier. A harness with an unused blue wire is a good sign you’ve kept that lead usable.
- The harness power wire is not your amp power wire. The thin harness leads and 10 to 15 amp inline fuse are sized for the stereo. An amplifier needs its own heavier power cable run to the battery, with a fuse near the battery. Sizing that cable correctly depends on your amp’s current draw and the cable length.
- A bigger electrical load can show up as dimming headlights or a stereo that resets. Fixing it means looking at the battery, alternator and grounds, not at the harness. Our battery isolator guide covers one approach.
- A factory amp, a factory subwoofer or a premium system changes which harness and interface you need, and may change which amp and subwoofer make sense.
If you’re deciding what to upgrade first, our car audio upgrade planning guide walks through the order. And when volume is the goal, the guide to what makes a car stereo play louder explains where the gains actually come from.
What to buy alongside the harness
A clean swap usually needs a small kit of parts, not only the harness:
| Part | Why you need it |
|---|---|
| Vehicle-specific adapter harness | Plugs into the factory radio connector without cutting |
| Dash kit | Fills the opening so the new stereo sits flush |
| Antenna adapter | Many vehicles use a plug that differs from aftermarket stereos |
| Steering-wheel control interface | Keeps the buttons working, if the car supports it |
| Sealed connectors or solder and heat-shrink | Makes durable joins |
| Integration module (CAN-bus or factory amp) | Required on many newer or premium-audio vehicles |
Write this list against your car before you buy anything. Ordering a harness alone and finding out at the dash that you also need an antenna adapter and an interface module is the classic weekend lost.
Common mistakes
- Cutting the factory plug. It makes the swap permanent and risks the wrong wire.
- Trusting color alone. Check both diagrams.
- Ignoring a factory amp. The result is weak, distorted audio and a lot of troubleshooting.
- Buying the cheapest harness for a powerful head unit. Compare wire gauge and build.
- Forgetting the future amp. Decide now whether you’ll add one, so you leave the turn-on and preamp options open.
- Skipping the battery disconnect. It’s the cheapest safety step you’ll take all day.
Where Crystal Audio Solutions fits
If your swap is part of a bigger plan, we help you get the whole system to match. Our Build My System service gives you system-matched recommendations based on your vehicle and your goals, with compatibility checked before you buy. That covers the subwoofers, amplifiers, wire, batteries, alternators and enclosures that sit on the other side of the head unit. Our team includes real installers, and you can reach them for direct, personalized support.

We also offer automatic bundle savings and flexible payment, which helps if you’re building in stages. Start at Crystal Audio Solutions to build your system, or read our financing options guide if you want to see how paying over time works. If your amp and sub are the next purchase, the amp and subwoofer matching guide shows how to pair them.
Our perspective
The harness is the cheapest part of a car audio upgrade and the one that decides how smooth the whole job goes. A good fit means a clean, reversible install. A wrong one means a dash in pieces on a Saturday night.
What we see in the way we work is that the real trouble starts a step later. People pick a head unit, then an amp, then a sub, each on its own merits, and the pieces don’t add up. The power wire is too small for the amp, the sub is mismatched to the amp, the electrical system can’t keep up. That’s why we plan a system around your vehicle and your goal first, and choose parts second.
So we’d tell a friend to do three things. Write down the features you want to keep. Decide whether an amp and sub are coming. Then match everything to your exact vehicle before you buy anything. Doing it in that order means you open the dash once, and every part you add later has a place to go.
Colten
FAQ
Do I need a wiring harness to install an aftermarket stereo?
In almost every case, yes. The harness lets the new stereo plug into the factory connector without cutting the car’s wires. That keeps the swap reversible and avoids wiring mistakes. It’s also the quickest way to get a clean install.
Is a car stereo wiring harness the same as a radio wiring harness?
Yes, the terms mean the same thing. Both describe the adapter that connects an aftermarket head unit to the factory radio plug. Don’t confuse it with the harness that comes in the stereo’s box, which is the other half of the connection.
Will a wiring harness keep my steering-wheel controls?
Not by itself in most cases. Keeping steering-wheel controls usually needs a separate interface that matches both your vehicle and your head unit. Choose the head unit and the interface together, and confirm both against your exact vehicle.
Can I use the same harness if I add an amplifier later?
Yes, as long as the harness leaves the amp turn-on lead and the head unit has preamp outputs. The amplifier still needs its own heavy power cable and fuse run to the battery. Plan that when you pick the head unit, and we can match the amp and wire to your vehicle.
Sources
- What Is Car Stereo Wiring Harness: components overview
- Car Stereo Wiring Harness Guide: ISO vs CAN-Bus
- How to Replace a Factory Stereo Without Losing Features
- 3 Easy Methods for Wiring Your Aftermarket Head Unit
- NHTSA-hosted GM service bulletin on airbag wiring precautions
- Head Unit Installation Cost: A Guide to Pricing 2026