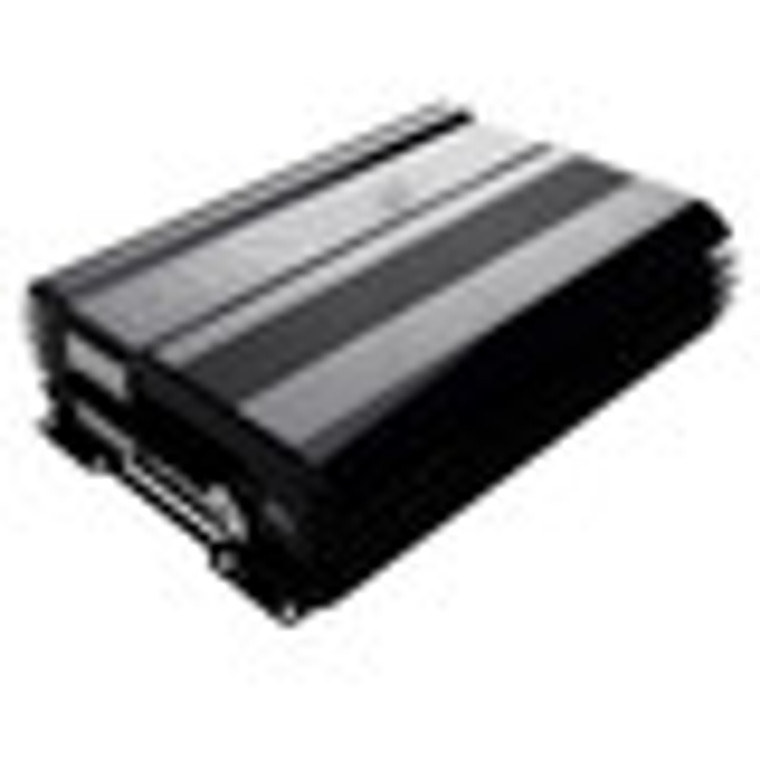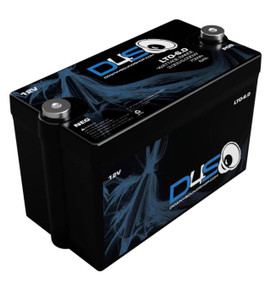
DOWN4SOUND | D4S JP40 - 12V Lithium Car Audio Battery ( 6000 - 12000W )
Down 4 SoundJP40 12 Volt Lithium Car audio Battery
The perfect solution to 12v car audio lithium battery wonders is here! This will help out those who both do and dont have a high amperage custom alternator. NOTE that having an upgraded electrical with a high output alternator will benefit the JP 40 - 12v car audio lithium battery but is not needed. This 12v car audio lithium battery is good between 6000w thru 12,000w systems.
Wattage rating varies widely depending on alternator input ( 6000-12000W)
USE ONLY INSIDE OF VEHICLE. (Do not use under the hood or outside of vehicle. DO NOT use with any other type of batteries including different lithium chemistries and any lead acid or AGM batteries)
Example:
- 120-160A alternator - 6,000w rating
- 240-270A alternator - 8,000w rating
- 320-370A alternator - 10,000w rating
- Single 450A Alternator Or Dual 240+a alternators - 12,000w rating
This battery is a Lithium Iron Phosphate (LiFeP04/LFP). Down4sound's JP40 is the most powerful LFP for its size in the car audio industry.
- JP40 Battery Size is 10.5 inches long, 8.25 inches wide, and 3 inches tall. Weighing in at 14 pounds.
- The JP40 is the first car audio lithium battery with an integrated voltage and temperature monitoring and notification system. We are taking the guesswork out of the picture.
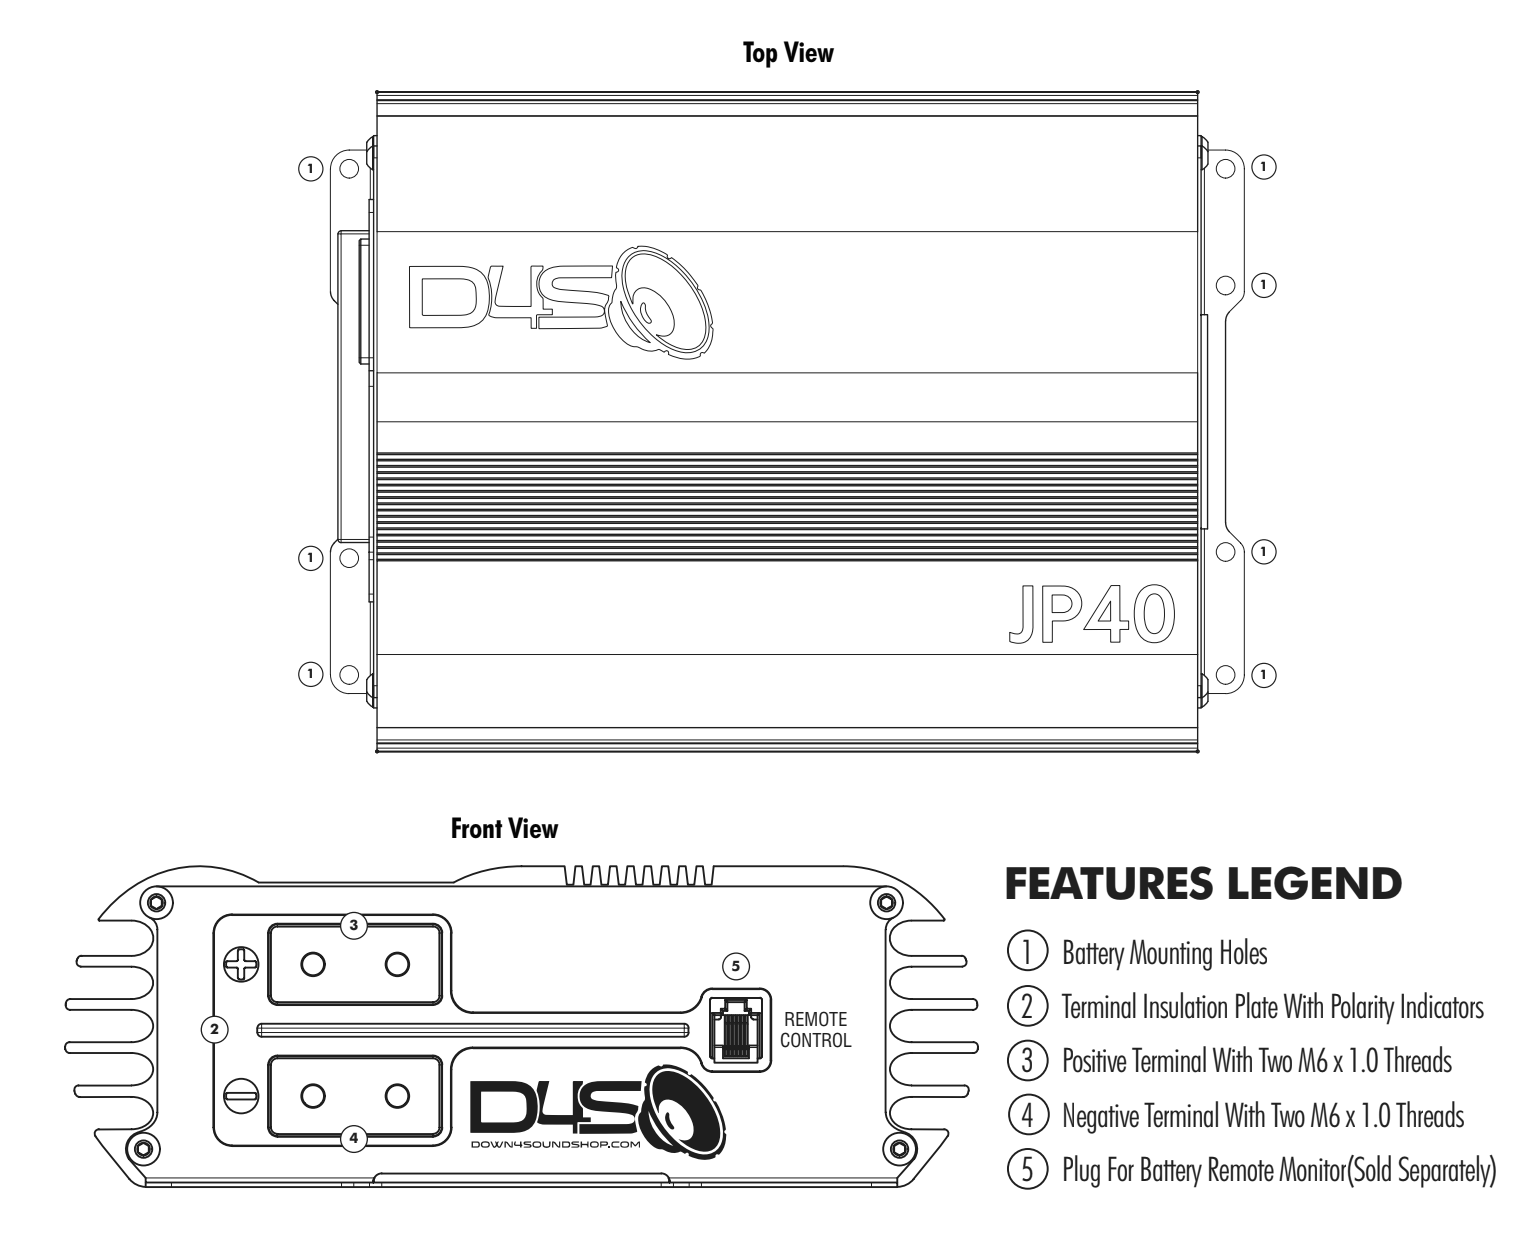
- The JP40 also features a compact LOW profile & infinitely expandable car audio lithium battery. The JP40 shares a similar look to JP Amplifiers with its Sleek machined aluminum housing, allowing rapid heat dissipation; a bonus is that's it is easily mountable.
No voltage boosting necessary- DO NOT EXCEED 14.8v as this will cause damage to the battery.
- Onboard balancing
Aluminum housing isolated from ground to reduce the risk of short if 12V power accidentally contacts the battery housing.
SPECIAL INSTRUCTIONS FOR THIS PRODUCT
This product has a metal housing. The metal housing is used to wick away the heat generated by the
lithium cells under high load to keep them cooler and so they can operate at higher efficiency. Metal also
conducts electricity and requires added safety considerations when using this product. This battery is
intended to be properly mounted before use. If the battery is not mounted it is possible for the battery to
shift during use and it could come into contact with metal causing a short to the battery. Extra care must
be taken when attaching ring terminals, bus bars, and other attachment. The insulated area around the
terminals and the safety bar between the terminals make accidental shorts much less likely to occur.
Make sure all wires and connections in the vicinity of the battery are properly insulated to avoid any
accidental shorts.
PROPER CHARGING IS CRUCIAL!
Charge before initial use, be sure to read the instruction sheet for full instructions. Proper charging is
crucial to the life of your Down4Sound battery. It is very important that the temperature of the battery
remains cool with respect to the charge voltage.
DO NOT OVER-TIGHTEN BATTERY TERMINALS!
Whether using the terminal adapters, bolts or screws, the tightening torque should never exceed 6 ft-lbs
max on any Down4Sound battery!
INTRODUCTION
Your new Down4Sound lithium battery is the industry leading lithium battery made for pulse discharge
loads. Lithium cells hold, in general terms, three times the energy density of lead acid batteries. However
they need careful management to be safe and provide a long service life. Fundamentally, they have
serious risks associated with them and these must be understood to avoid danger, loss of property, and
personal injury. Don’t let the size of this battery fool you, it is very powerful, and if not operated correctly,
capable of being very dangerous.
TECHNICAL ASSISTANCE
Be sure to check out down4soundshop.com for additional technical and product information.
INSTALLATION
You may mount the lithium battery in any direction as long as it is secured from short circuits and/or
movement. One word of caution though. This battery is very light and therefore it does not require a great
deal of force to hold it. Do not crush the battery with battery retention systems. The threads are M6-1.0.
Optional terminals are available. Be extremely careful when making connections. Remember there is no
low voltage disconnect, reverse polarity, or short circuit protection on the main terminals of this battery.
Further the power output of a lithium battery is four times that of typical lead acid batteries. Short circuits
will flow huge amounts of current instantly with the ability to melt metal.
Do not expose to temperatures above 60oC (140oF). Avoid mounting this battery in the engine
compartment if at all possible. Elevated temperatures accelerate the aging process of most battery types
and lithium batteries are especially sensitive to high temperatures. Open circuit voltage should be above
12V, when fully charged after resting for 8 hours. If it is less than this after resting for 8 hours, the battery
should be taken out of service and must be checked for capacity, cell balance, and State of Health before
resuming operation.
WARNINGS
To reduce the risk of fire or personal injury including burns:
- Do not over charge the battery (meaning exceed the maximum voltage OR amperage and remove the
charger once the battery is at 100% SOC.).
- Do not short circuit the terminals.
Use with alternators requires that the charging voltage be limited to 14.4V or less. 13.8~14.0 is
preferred for 12V models.
- Do not charge this battery with an alternator if the terminal voltage is below 10V.
- Contact Down4Sound for assistance before proceeding.
- Avoid high temperature. Never operate the battery in environments above 140o
F or if the battery itself
exceeds 140o F at any point. WARNINGS(cont’d)
- Lithium batteries contain flammable gases. Have a plan in place to respond to possible fire.
- Disconnect the battery in total before welding anywhere on the vehicle. Do not submerse in water. This
battery is not waterproof.
- Do not crush, puncture, or dispose in fire or water.
- Do not attempt to open, disassemble, or service the battery pack.
BATTERY MONITORING FUNCTIONS
The remote provides real-time monitoring and display of battery voltage, percentage battery
capacity, and the internal temperature of the battery.
- Low voltage alarm: The voltage display will flash in real time when the voltage is getting close
to fully discharged. Charge battery before the voltage drops below 10V. Do not discharge the
battery lower than 10V or damage may occur.
- High voltage alarm: The voltage display will flash as the battery is close to the maximum
charge. Do not allow the battery to over charge or damage may occur.
Low temperature alarm:
- The temperature display will flash if the battery temperature drops
below -20 C / -4 F. If the battery temperature is at or near this threshold it can be charged
with low voltage is
approaching 55 C / 149 F. If the battery temperature is near or at this threshold, discontinue
use of the battery until the temperature drops to the operational range. Over"__mce_add_custom__" title="JP40 Lithium Battery remote " src="https://cdn11.bigcommerce.com/s-209k8v1/product_images/uploaded_images/screen-shot-2022-03-21-at-8.24.15-pm.png" alt="JP40 Lithium Battery remote " width="738" height="644" />
THE IMPORTANCE OF THE REMOTE DISPLAY:
In demanding conditions of high amperage discharge, fast charging, and extended high
amperage discharge, it is important to monitor the battery to keep the battery from being
damaged. If the battery is discharged below the minimum voltage the battery will be damaged,
and such damage will cause the battery to lose performance and/or cause a dangerous
operating condition which could result in personal injury, equipment damage, or death. The
same is true if the battery is allowed to over heat, or be over charged. This remote tool is a way
to monitor the battery’s operation within the specified parameters without a putting restrictive
Battery Management System (BMS) that reduces the amount of control the user has over the
battery’s operation. As with all tools, it is only as effective as the user. If the warnings are not
heeded, or ignored the battery may become damaged, and this will void the warranty.
CONNECTION METHOD
The remote monitor has 2 plugs, a Phone jack, and an 2 pin port. The phone jack is connected
from the remote monitor and the plug labeled “remote” on the face of the battery.
The 2 pin plug on the remote monitor can be used to connect the monitor to a 12V power
supply, (Example: the cars ignition system.) as a alternate power supply to keep the remote
monitor from using the battery’s power.
INSTRUCTION FOR USE:
Connect the battery with the remote monitor using the supplied cable.
To Change Voltage/Capacity Display
The default mode of the voltage/capacity display is the battery’s voltage. If the button
marked “Voltage/Capacity” is pressed, the display will change to the show the battery’s
capacity in percentage of remaining charge. If the button is pressed again, it will return to
the default display.
To Change The Temperature Display:
The default mode of the temperature display is in Fahrenheit (Fo). If the button marked
“Temperature” is pressed, the display will change to the unit of Celsius (Co). If the button is
pressed again, it will return to the default display.
REMOTE
The JP40 Remote Display ships in the default setting that allows for plug and play use with the
JP40 battery. Initial programming is not required when you purchase this remote for use with
JP40. However, this remote is also designed to be used universally with AGM, Li-Po, LTO and
other LFP type batteries in many configurations. Although the programming details shown
below are accessible, they are only applicable to the universal remote model, which includes
the voltage and temperature sending unit that can be used external to any battery. This will
not allow for the accurate internal temperature readings you get from your JP40 Battery since
the sending unit is already inside the battery. The programming instructions are provided
below for knowledge about these functions in case the menu is accessed accidentally, and the
settings need to be corrected for accurate functionality of the remote display.
Press and hold the “Menu” button for six (6) seconds to access the program mode. The display
will flash indicating it is in program mode. If no buttons are pressed within six (6) seconds the
unit will automatically exit program mode.
To set battery type, enter program mode. Use the Buttons marked with the up and down arrows
to select the correct battery type. The battery types available to select are as follows:
L - Lithium Ion Batteries (Li-ion, Li-po) [ Cell Voltage is 3.6V-3.8V ]
F - Lithium Iron Phosphate Batteries (LFP) [ Cell Voltage is 3.2V ]
P - Lead Acid Batteries (AGM) [ Battery Voltage is 12V ]
t - Lithium Titanate Oxide Batteries (LTO) [ Cell Voltage 2.4V ]
Once the battery type is selected, press the “Menu” button again to set the number of cells in
series. The display will once again flash,
Set the number of cells in series using the up and down arrows as before.
EXAMPLE: 3S - is set to 03
4S - is set to 04
5S - is set to 05.... Etc.
After six (6) seconds with no buttons pushed, the unit will exit program mode automatically. If
the setting are not correct, re-enter program mode and select the correct settings. If the remote
setting are incorrect, the information displayed by the remote will also be incorrect.
THE EFFECTIVE RANGE BY TYPE OF BATTERY
The limits for the number of cells or batteries in series are noted below:
Lithium Ion ( Li-ion, Li-po ) (L) - L02 - L20
Lithium Ion Phosphate (LFP) (F) -F03 - F24
Lead Acid Batteries (AGM) (P) - P01 - P06
Lithium Titanate Oxide Batteries (LTO) - T05 -T24
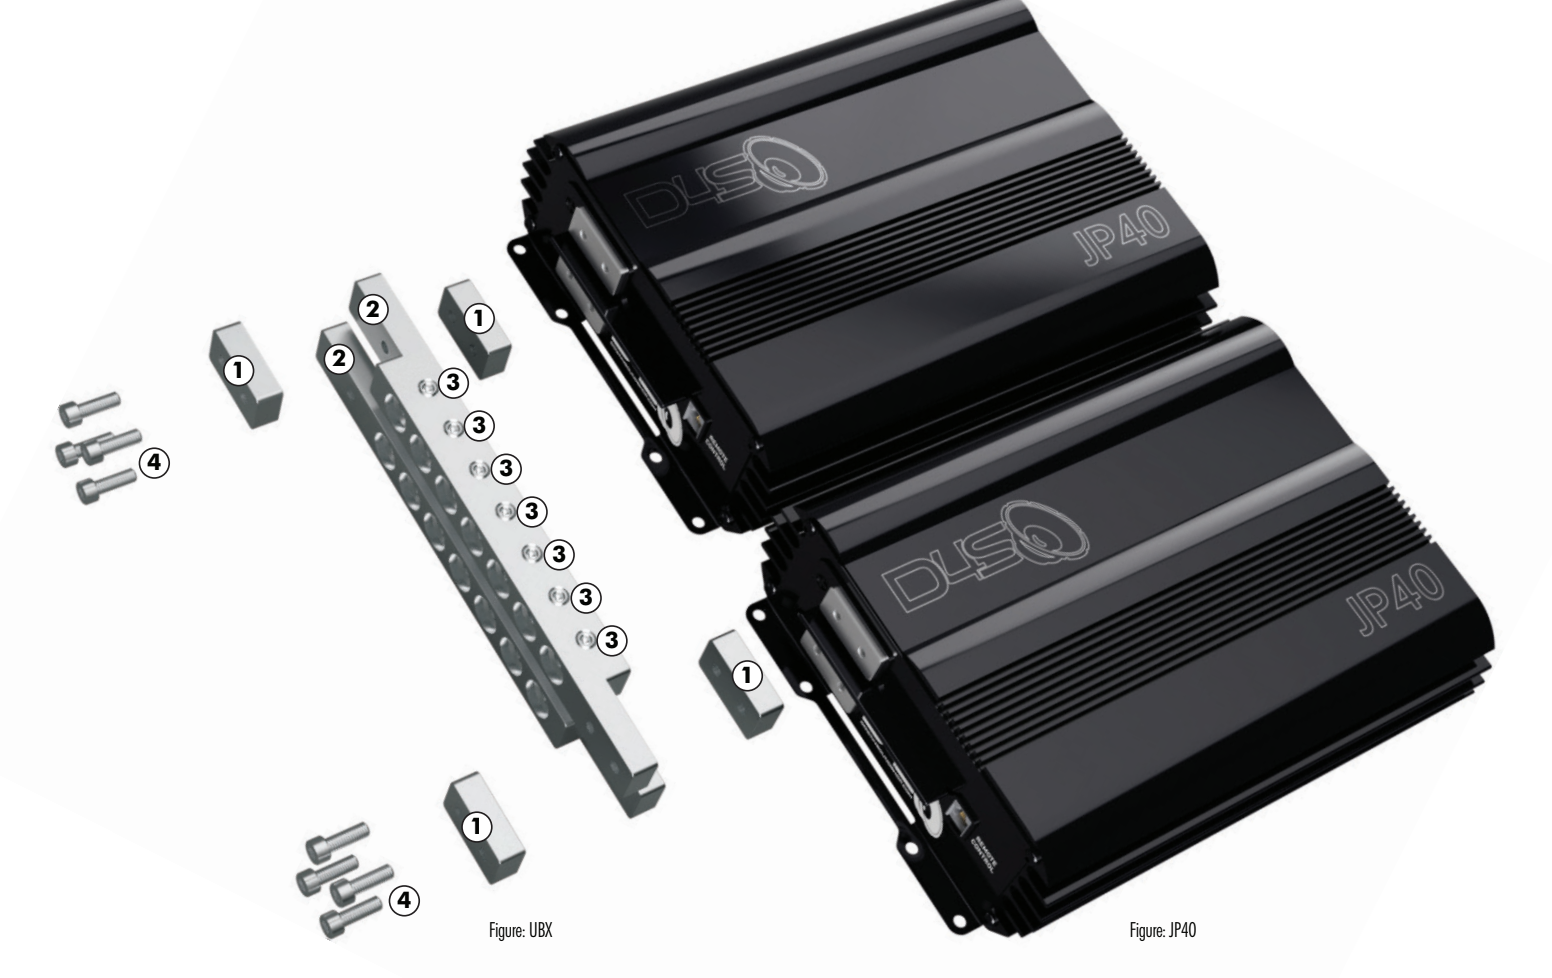
UBK INSTRUCTIONS
The “Universal Bus Kit” is used to connect in parallel two (2) or more batteries. By adding
additional kits more batteries can be added to the circuit. The bas bars also serve as terminal
blocks with seven (7) 0 Gauge or 00 Gauge positive and negative connection ports on each pair
of bus bars.
The “Universal Bus Kit” contains two (2) major components, the bus bars and bus bar spacers.
The spacers are used to fill the space at the ends of the bus bars if only one bar is used. If more
than one bus bar is used to connect three or more batteries, the spacers will always be on the
outer most ends of the bus bars.
FEATURES LEGEND
1 Spacers, total of four (4) per kit, two per bus bar.
2 Bus bars, total of two (2) bus bars per kit.
3 Set screws, total of fourteen (14) per kit, seven (7) per bus bar.
4 Long mounting screws, eight (8) per kit, four (4) per bus bar.

