Product Description
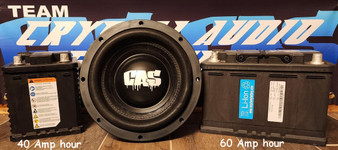
XS Power 40Ah LTO YinLong lithium cell.
These 2.3v 40ah lithium titanate cylindrical (LTO) cells can be grouped in a pack of 6
XS Power 40Ah Lithium YinLong 2.3v individual Cell Specs:
Weight Lbs. – 2.75lbs each
Length – 10 in
Height – 3 in
Width – 3 in
Charging Voltage – 2.3-2.7V (13.8-16.2V for 6 pack)
Amp Hour – 40Ah
Cell Type – Lithium Titanate Cylindrical (LTO)
34-66160-40 – Lithium Titanate Cylindrical, New, 66160, 40Ah, 2.3V
4 Year Manufacturer Warranty
PROP 65 WARNING: This product can expose you to chemicals including lead and lead compounds, which are known to the State of California to cause cancer or birth defects or other reproductive harm. Wash hands after handling.
For more information, visit www.P65Warnings.ca.gov
Thanks for purchasing your product from XS Power Batteries! I have decided to put together a list of assembly steps once a person receives their cells. This should help with repetitive questions and mistakes caused by improper initial setup (therefore saving you money).
- Remove all cells from boxes. If cells appear damaged, contact the shipper. We recommend inspecting cells prior to signing for them upon delivery. If they are damaged, do not sign.
- Grab a digital multimeter and check the voltage of each cell (+ on one side and – on the other side of the same cell) Write these numbers down. If cells are all within .1, skip step 3/4 and move to step 5.
- Place all cells in parallel. So + + + + + + on one side and – – – – – – on the other. Connect all + on one side together, then separately connect all -‘s together on one side. This allows the cells to passively balance. It is important to ensure a stable connection from cell to cell here, any substantial change in contact can cause an imbalance.
- Leave the cells for an hour or 2 like instructed in step 3. Grab you dmm again and check each cell individually. If they are all within .1, go ahead to step 5. If not, continue this process until cells are within .1 tolerance or so. Write down each cell voltage.
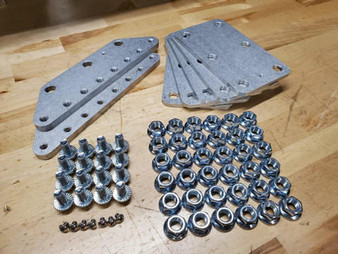
- Start assembly. Remember, cells go in series now. So + – + – + -. DO NOT OVERTIGHTEN. 5ft lbs of torque is all these cells need. If you are in a bad mood or have had a long day, consider waiting till the following day. A simple bit above hand tight is perfectly fine. Once done, your total voltage (using your dmm) should read the sum of all your numbers wrote down from step 4. If they aren’t, disassemble and check to make sure nothing is switched around. To check total voltage, top of one side and top of the other side of the bank ( the + on one for side top and the – on the other top end). This step is very important. M12x1.75 nuts are the size. NO NYLON NUTS.
- Check all connections again, and check to ensure any cell casings are not touching each other (Beneath the covers, the cells are live. If 2 rub through they can short and destroy your bank). If you are using a balancer, assemble it and wire it now. See picture labeled #3.
- Almost done! Once you are happy with everything, I recommend a small bit of silicone or similar on the tip of the nuts to ensure they do not back off of each stud. A simple drop will do, no need to mummify it.
- Charge the bank up to 14.0 or above. Any lower and the alternator will hate you for a few minutes until the bank reaches its set point.
- Build a protective case or secure the battery. Sounds crazy to have to say this, but it’s here so you can guess it’s happened. Every connection on these banks are live, and if brushed against a conductive material can cause damage to the bank (as well as other parts of the stereo and/or the vehicle).
- Turn the system loose! Let it play! Give it a good rip for a few minutes and then turn the system off. Check all connections of the assembly. If something feels oddly hot, remove and inspect.
- Share your picture in the XS Power groups!
P.S. I recommend checking all connections each month for safety and reliability. A simple loose bolt can destroy an entire build.
– Written by Shawn Mayo of XS Power


